Video of Kershaw Leek Blade Lock Replacement - Fits Kershaw Leek, Chive, Scallion
Kershaw Leek Blade Lock Replacement - Fits Kershaw Leek, Chive, Scallion Description:
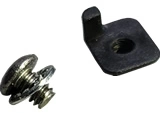
This is a replacement blade lock for the Kershaw Leek knife. It includes the blade lock, the screw, and the lockwasher. To make this go smoothly you need the Kershaw T-Tool. This blade lock also fits the Kershaw Chive and Scallion knives.
Kershaw LEEKBLADELOCK video transcript:
I have in my hand a Kershaw Leek that needs the blade lock replaced, as you can see the blade lock is gone from this Kershaw Leek. What you're going to need is the Kershaw T-tool and two of its bits, the bits are included with the T-tool. And then you need the little blade lock and screw to install in this knife. So the first thing I'm going to do is disassemble this Kershaw Leek using my two bits from the T-tool. Now whenever you're taking apart this Leak you want to be very careful, you want to have the knife open so that way the torsion bar doesn't have any uh tension on it or anything and unscrew it like this, get these screws out, take apart the knife and you see now I've exposed this little area where the torsion bar goes. All right, so I'm going to now install the torsion bar. All right, I'm rotating it and you'll feel it actually uh pop into place where it's supposed to go. All right and I've done that, I don't know if I can focus it there but you see I've got it installed. And so I'm going to put my finger on the back of it here, take my little screw here and make sure I use the small bit for my T-tool and I'm going to put that little screw on top of this bit here. And if I hold myself just right I should be able to get it started on there. And there it is, I've got it started. You don't want to put it on too tight because it needs to be, you know, where you can actually slide it. Okay, if you get to knock that together and it's too loose or too tight you can actually adjust it with the knife still put together so that's a nice little feature there. Okay so I want to show you that this blade has a copper washer on either side of it, you want to make sure that those are there. All right, I'm going to put my blade on here and then I'm gonna take this handle and I'm going to put the torsion bar back in like so, make sure it lines up. All right and then I'm going to take my spacer, put it on like this and then I'm going to use my three screws here to hold the spacer in place, just going to kind of stuff it in there like that, almost lost that one, things are hard to see. Okay. Okay. Now I've got this set where I want it, I've got the knife in the open position, I'll lay it just on top of it right here, make sure these screw holes line up with the handle, got my make sure the hinge is in place here and you see how I've got a little gap right here. That's because the torsion bar isn't set. So what I like to do is uh close the knife until you feel it pop like that right there, that means it's it just set inside inside the blade. Alright so now I'm going to tighten these down and you don't want to get them too tight because these four screws is actually what can controls the speed of the assisted openings, get it too tight your assisted opening isn't going to work. I'll show you what I mean by that. I'm going to seat this hinge screw pretty tight and then I'm going to see that it's not it's not opening because it's too tight, you got to back off a little bit, a little bit at a time. All right, all right, I'm going to sneeze up just a little bit. Okay, got that set, I don't have any blade slack here so I'm good. You want to set it just perfect so you've got your assisted opening but your knife still is doesn't have any side to side travel right there and it locks up nice and tight. So now we have replaced our blade lock on our Kershaw Leek.

 call (800) 458-1606!
 email us!
 Kershaw-Knives.net is safe, secure, and trusted.