Video of Kershaw Leek Blade Replacement - Plain Edge
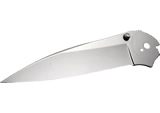
Kershaw Leek Blade Replacement - Plain Edge Description:
This is a new oem replacement blade for Kershaw Leek model knives. This is the plain edge blade and it fits all Kershaw Leek knives. The blade may have XXX engraved on it, these replacements do come from Leeks that are classified as seconds. This blade is new and has never been used.
Kershaw LEEKBLADE video transcript:
Hello from Two Point Enterprise! The website is kershaw-knives.net. Today, I'm going to show you how to put a new blade on your Kershaw Leek. Okay, I've got a Leak here that doesn't necessarily need a new blade, but I'm going to pretend that it does and I'm going to put this blade on. What you'll need: The T tool (it's got Torx bits in it that actually fit these four screws that are on the knife). First, take the big Torx bit and remove the little hinge screw right here. Then put your other smaller bit in and remove the other three screws in the handle. When you get these screws out, you want to be careful. When you remove the handle, keep the knife together like this and then just take the screws out individually. Very carefully, pull the top part of the knife off. You'll see the torsion spring inside. Definitely want to keep that in its place. Behind that's going to be the little cover for the torsion spring. Put that back, kind of keep it in order. Behind that is the blade. One thing to notice here is that these blades have a little copper washer on each side of them. Definitely want to make sure not to lose that because that really helps with the opening and closing of the knife. So you should have two of them. Get rid of your old blade and put the new blade on the knot. Put your copper washer here and put the blade on like so. Then get your other copper washer and put it on the blade. Now you gotta make sure that your handle spacer is in place. Then take your handle with the torsion bar and put it so that one side of the bar is in this slot that's on the handle spacer and then the other is going to be in that little hole right there. The other side of the spring is going to be in a hole. Since you've taken apart and put together these knives thousands of times, here's a tip: Get the top one in the handle spacer first. In fact, what you can do sometimes here is actually take the handle spacer and put it over here on the handle like this. Now you've got your handle put back together and your little spacer in the spot. You see it's got to line up over those three holes that are going to be where you have your screws. Take these screws and put them into the handle spacer like this. Essentially, they're serving as pins right now to keep everything in place. So that whenever you put the knife back together, you can just align the screws. You've already got your torsion spring inside the spacer there so you don't have to worry about that. Go straight down on this knife, align that hole up with the pin on the handle. Now you've got it kind of close and you want to set your spring right. Make sure that it catches on the blade. So before you even do anything, just kind of close this knife and whenever you did, you felt it catch. Now you've got the torsion spring set into the blade so that way you get to keep your assisted opening system working. Tighten these screws up just a little bit. You're just going to bottom it out and you're not going to get real crazy about seating the screw and the knife firmly just yet because these three screws plus this hinge screw are actually what controls the speed of the assisted opener. So you want to find that sweet spot with all of these Kershaws whereby you don't have your blade flopping around. Check for slack in the blade. Test out your assisted opening. If it didn't come open, something needs to be adjusted towards a little bit quicker. Loosen the screws a little bit by maybe 12 degrees. Unseat them a little bit, loosen them up just a tad. Loosen up the screws on the handle a little more until you get to a sweet spot where there's no slack in the blade and the assisted opening is working well. And the knife has a new blade on it!


 call (800) 458-1606!
 email us!
 Kershaw-Knives.net is safe, secure, and trusted.